|
The theme for the September 2011 IPMS-Hawaii meeting was Polishing the Turd.
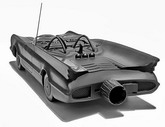
What could be more of a turd than Aurora’s original Batmobile kit from the 60’s? (Stop screaming “Starfix” will ya!).
This kit was re-released under the Polar Lights label and has all the hallmarks of a 60’s kit.
Thick plastic, poor fit, instructions written in ENGLISH, tons of flash and a really odd scale.
The box says 1/32 scale, but comparing the figure of Batman to a 1/35th scale figure, he looks like he’s 10-years old!
Tiny little bugger! Robin is even smaller looking like a 6-year old. I would bet this kit is 1/40 scale instead of 1/32 scale.
But then I didn’t compare it to published dimensions for the Batmobile used on the TV show.
After cleaning up all the parts for flash and straightening out and thinning down a lot of the edges, it was time to glue things together.
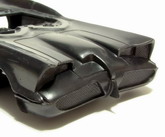
The nose was a poor fit to the main body and this required quite a bit of filling and sanding with thick CA from Zap-A-Gap and 160 grit sandpaper to get a smooth finish.
I really hated the chrome parts. I tried removing the chrome with bleach, Easy-Lift-Off, acetone and finally I just gave up.
The only chromed parts I ended up using were the seats and the dashboard. By getting rid of the other chrome parts, this build went from a traditional Out-of-the-Box to a “rebooted” build.
I was going to change things up a bit!
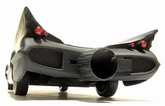
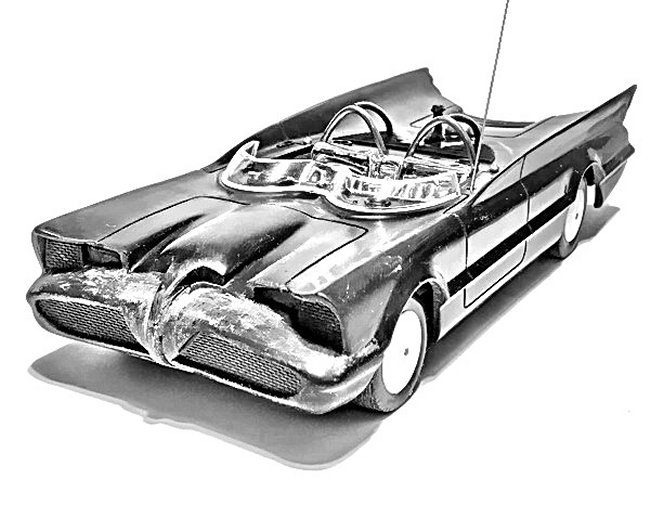
Gone were the really ugly chrome hubcaps and mortars. Gone was the arch for the sirens and lights. And gone was the glossy shiny exhaust! Good riddance! Now here comes the really odd idea, a Stirling Moss Batmobile Roadster, Hah!
|
Click on
images below to see larger images
|
|
|
Who Is Stirling Moss?
Stirling Moss is a pioneer race car driver who drove in competition from 1948 to 1962. He retired in 1962 after a crash left him in a coma for several months.
Despite an early retirement, he remained an influential figure in racing and race car development. The Stirling Moss inspired Mercedes Benz McLaren SLR is now inspiring me to mod the old Batmobile into this century.
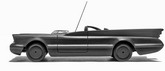
First thing up was tossing the chrome mag wheel inserts. I replaced these with moon caps made from 40 thou plastic. I originally thought I could bend these into shape with a steel ball bearing and a soft surface, but that didn’t work.
I ended up mounting the 40 thou disks on a mandrel on my Dremel tool and shaving the plastic down into the moon cap shape I wanted.
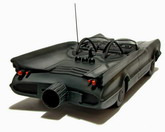
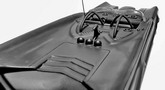
I did away with the cockpit arc for the siren and flashing lights. Instead I stuck one of the lights on the rear deck and added curved roll bars behind each seat. These were formed from thick wire solder pressed against a bottle of Zap-A-Gap o get the arched shape uniform. How easy is that?
The three rear mortars were replaced with BB’s to represent the three mortar bombs in place.
As I wasn’t using the rear canopy, the placement holes were filled with brass bolt heads from Adler’s Nest.
For some odd reason, I filled the hole for the rear view mirror with a 1.5M antenna also from Adler’s Nest.
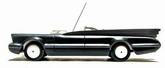
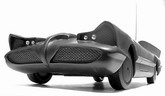
The front canopy was cut down to better capture the Stirling Moss inspired look I wanted for the car.
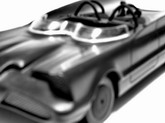
I used my trusty Tamiya Scriber to scribe a level line across the canopy. Then the glass was ground down to the line with a cutter head in a Dremel tool. The edges were cleaned up with a scalpel and the glass was polished with micro mesh sanding pads starting with 2400 grit pad and going all the way to 12000 grit pad.
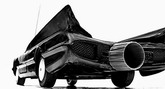
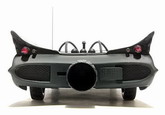
I threw out the ridiculously small looking jet exhaust. I grabbed a J-79 exhaust from an F-4N Phantom by Monogram in 1/72 scale and shoved that up the rear of the Batmobile.
Unfortunately, I had not opened the hole large enough and proceeded to crack the body.
There’s an innuendo in there somewhere……and a double entendre too.
Any Color as Long as It’s Black
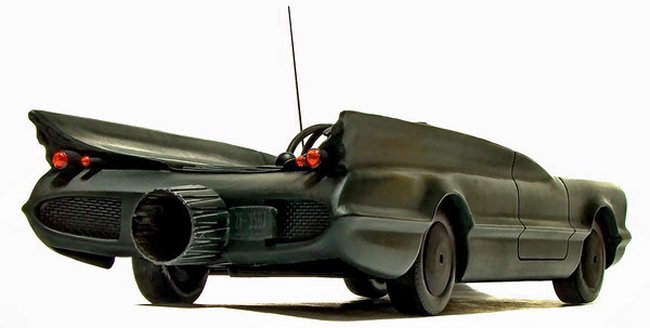
After gluing and sanding the crack smooth, the model was ready for paint. I blasted the entire model with Tamiya NATO Black.
It took a few days for this to really harden (humidity and the thickness of the paint had something to do with that) and after I was satisfied, I started to sand the paint down with 2400 grit sanding pad.
This took off the roughness and orange peel look of the paint. I wasn’t trying to polish the paint as much as give it scale smoothness.
Taking photos of the model during construction helps spot the areas that need fixing. My failing eyesight requires I use a camera to inspect the surfaces of the models I build.
The photos of this model showed several flaws in the nose of the car. These were fixed and the car given another coat of NATO black.
The areas under the canopy in front of the drivers was painted Polly S RLM 66 Scale Black.
The radio box and dials were painted RLM 22 Night Black. Not a huge difference, but it’s there.
RLM 22 was also added to the grills in the front and back as well as on the roll bars and ribbed area under the roll bars.
The hubcaps were painted RLM 66 with RLM 22 tires. Now the whole thing is just a sea of black, like some disaffected gothic teenager in mourning.
I’ve seen a few cars running around Honolulu in Matt Black, so I decided to leave this car in Matt Black as well, just trying to make it look meaner and more sinister.
That and I felt too lazy to get this up to a deep gloss shine with those ugly red stripes, Bleh.
All that is left is painting the frames of the windscreen, painting the dials of the instruments with silver and clear red and metalizing the exhaust cone.
I added a 2mm and 1.5mm diameter lenses to the front as headlights. I drilled two holes on the back of the Batmobile’s fins for two brass rods to support the rear brake lights.
I added a 3mm plastic tube to the inner rods to hold a 3mm lens for a brake light.
I used a tiny lens on the other brass rod and painted them both red.
Does this still count as Polished Turd even if I didn’t polish it?
Valentin Bueno
|
Click on
images below to see larger images
|
|
|
|
|
|